Managing Resources
Overview
The SDK provides 2 type of resources that can be loaded from the application resources (assets) and uploaded to the glasses to be rendered:
- Images via the
ImageUI element - Custom fonts via the
TextUI element.
All UI resource elements extend the UIResourceElement class.
Each resource is uploaded to a dedicated 'slot', and then can be referred for rendering via its slot number.
The image\font for the UIResourceElement can be defined via the setResource method:
- Image resource (image name and its slot) can be done via the
ImgSrcof theSpriteImgSrcclass - Font resource (font name and its slot) can be done via the
Fontclass
Images
There are 32 image slots into which you can upload PNG/JPEG images.
Both grayscale, transparency, and color are supported as long as they conform to the spec.
Limitations
- Max image size: 16Kb compressed
- Max pixels: 640x400
- Max slots: 32
Note
PNG rendering has better rendering performance. We recommended using PNG
Slots
Slot 0 is memory cached, fast slot, which is saved for sprite Images when used.
Slots other than 0 are flash cached (persistent between reboots).
PNG
PNG images must be encoded with sliding window size of 2\^15bytes or less (see PNG zlib encoding).
JPEG
JPEG compression: baseline only (progressive compression is not supported).
Sprite Images
The SpriteImgSrc class supports uploading a sprite image into Font.Slot.s0.
With the SpriteImgSrc you can tell the SDK which image within the sprite to draw, by the image x,y pixel location and the image width and height.
The glasses rendering will crop and draw the request image on the glasses display.
Optimizing Images
In order to optimize the performance when using images, it is recommended to strip the image from its metadata, convert it to the glasses native color space and use a PNG color palette.
To do that, we recommend using our image optimization script, which is located in the SDK repository Tools folder.
Another example of such a process can be achieved by using the following commands:
# strip metadata tags - this also works on jpeg images
mogrify -strip pic.png

# optimize palette
optipng -o7 -f 3 pic.png

# Those tools are available on linux or mac package managers. For windows
# you can download those from <https://imagemagick.org/> and <http://optipng.sourceforge.net/>
Fonts
Font resource are defined via the Font class
Stock Fonts
The glasses have 3 preinstalled fonts: Small, Medium, Large
The stock fonts include most of the common utf-8 base characters
Accessible via the Font.StockFont
Custom Fonts
The SDK enables loading 14 custom fonts
The custom fonts must be in SIF format and can be generated also by the font2sip.py utility.
The generated fonts must be not larger than 32KB.
Each custom font may include any characters, in any language in a predefined pixel size, as long as they fit into the font file size limit
Fonts are drawn from left to right
SIF Fonts creation
SIF fonts can be created by using the font2sip.py script, which is located in the SDK repository Tools folder.
The script and instruction can be found in the SDK repository.
The script creates a SIF file that can be added to the application resources to be uploaded to the glasses.
The script output file format contains also the character size parameter that can be used with the SDK, for example:
# Full description within the repository mentioned above.
python3 font2sif.py --path Calibri.ttf --size 36 --bpp 2 --ranges 0x0020:0x007E --exclude 0x0022 0x0025
The script creates 3 files:
- sifz
- json file
- sif (for backwards compatibility)
Generated files:
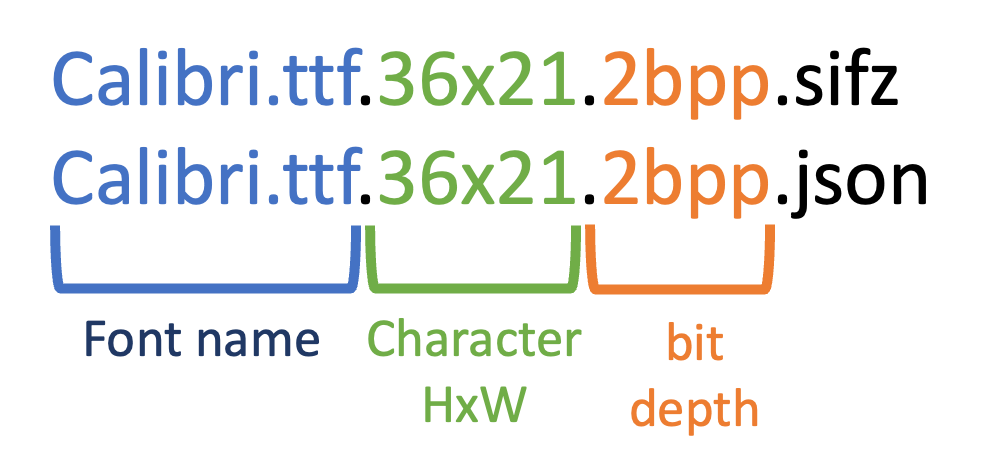
HxW means the character Height (pixels) of the highest character and the character Width (pixels) of the widest character (including the suffix margin between characters)
The sifz is the same as the sif file but compressed. Uploading a compressed font file improves the upload performance.
Adding the Json file
Adding the generated json file (in addition to the sifz file) to the application resources will significantly improve the text size calculations
API Key
The API key should be added to the application resources as a regular resource.
Adding resources to your application
In order to use Images and Custom Fonts (hence resource), the files should be added to the application.
When required, the SDK will load the requested file from the application data and will upload it to the glasses for rendering.
Sub Folders
Adding resources to a sub folder is supported as well.
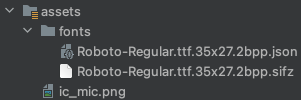
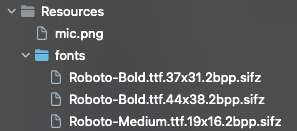
In the examples below, the font files were added to the 'fonts' sub folder. When referencing the resource, don't forget to add the subfolder prefix.
Android
Android resource should be located under the assets folder. The SDK uses the standard Android assets to load the required resource
Sample folder structure:
iOS
iOS Resources can be located in your project structure, same as any other resource.
We recommend creating a glasses resource group ('yellow folder') named 'Resources'.
To Support multi glasses model application:
- Create a folder via the 'finder' in your project hierarchy named 'Resources'
- Add the resources to the created folder
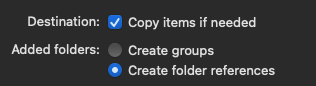
- Set the type to “Data”
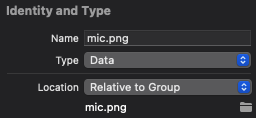
Sample folder structure:
Usage Example
The following example uses a custom font for your text:
// Override the screen onCreate
override fun onCreate() {
    super.onCreate()

    // Create the Font with the required font slot
    val f = Font("fonts/Roboto-Medium.ttf.16x13.2bpp.sifz", Font.Slot.s1)
    // Create the text and set the font
    val text = Text(f)
    text
        .setText("Hello Roboto")
        .addToScreen(this) // Add the text to the screen
}
// Override the screen onCreate
override func onCreate() {
    super.onCreate()

    // Create the Font with the required font slot
    var f = Font(nameWithExtension: "fonts/Roboto-Medium.ttf.16x13.2bpp.sifz", slot: Font.Slot.s1)
    // Create the text and set the font
    var text = Text(font: f)
    text
        .setText(text: "Hello Roboto")
        .addToScreen(screen: self)  // Add the text to the screen
}
Read Next
Learn about the UI Elements Transformations