Simulator
Overview
The SDK supplies a glasses simulator that can display the generated symbolics without the need to wear the glasses.
The SDK connects the simulator via WebSocket, assuming they are on the same network.
Development Tool Only
The simulator imitates the glasses rendering, but not all elements are supported and rendering may not be pixel-perfect compared to the actual glasses HUD. Before publishing an application, it is essential to test and validate it on the real glasses.
The Simulator
Setup
The simulator can be downloaded from:
The supported platforms are:
| OS | File | Minimum Supported Version |
|---|---|---|
| macOS | GlassesSimulator<version>.app |
Arm, macOS Ventura |
| Linux | GlassesSimulator<version>/ |
Ubuntu 20.04 (x86_64) |
User Guide
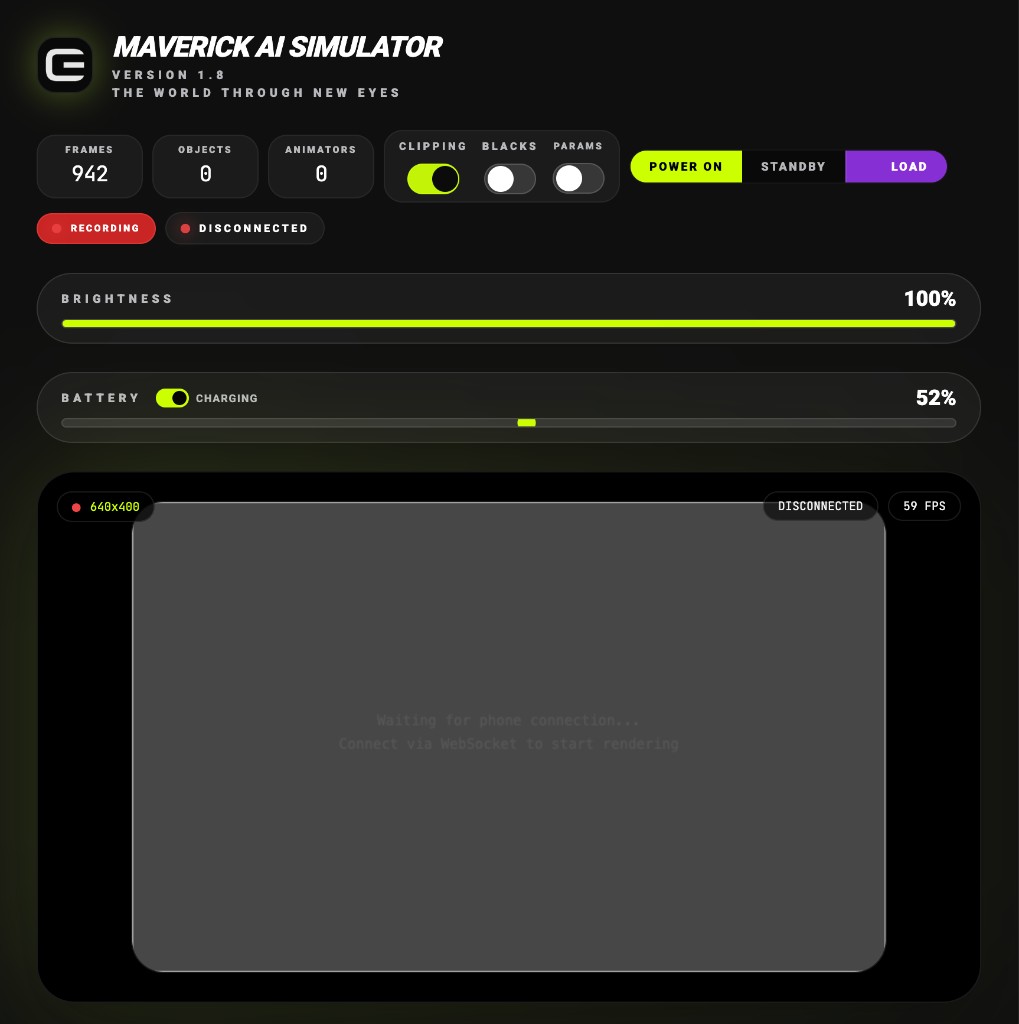
The simulator dashboard provides:
| Area | Description |
|---|---|
| Viewport | 640×400 canvas rendering the glasses display output |
| Status | Connected / Disconnected indicator and FPS counter |
| Stats | Frames rendered, Objects count, Animators count |
| Controls | Clipping toggle, Show Blacks |
| Power | Power On / Standby buttons |
| Brightness | Slider control (0–100%) |
| Battery | Level slider and charging toggle - simulates battery state reported to the SDK |
| Recording | Start/stop session recording for replay |
| Load | Load and replay previously recorded sessions |
The recordings and PNG screenshots are saved under the simulator's output directory.
Running
Double-click the macOS .app or run the Linux executable directly.
The web dashboard opens at http://127.0.0.1:8765/.
The SDK connects to the simulator WebSocket endpoint at ws://<host-ip>:8765/ws.
Connecting the Simulator
Ensure that you have properly set up your API key before connecting the simulator.
Configuring
The SDK handles the communication with the simulator via WebSocket transport.
Use Evs.glassesService.setConfiguredSimulator with the IP address only:
By default, setConfiguredSimulator also calls connect() automatically. To configure without connecting immediately, pass autoConnect = false.
To switch back to Bluetooth after using the simulator:
Connecting
In order to connect the simulator, it should be:
- Running and active (web dashboard shows "Waiting for phone connection...")
- Not connected to another application
- No firewall is blocking the simulator communication (port 8765)
- Reachable on the same network as your application
Stock UI
The SDK built-in scanning UI includes an option to select a simulator.
To open the scanning Stock UI with simulator support:
In the configure/scan screen, select the Simulator option and enter the IP address of the computer running the simulator. The simulator is not auto-discovered - you must manually provide the host IP address.
Limitations
- The simulator only generates UI. It does not support physical components like ambient and proximity.
- Camera and microphone use the PC's built-in camera and microphone when available.
- The simulator does not support firmware update.
LOS and Eye Tracking
Line of Sight (LOS) and Eye Tracking are not fully supported in the simulator due to the lack of physical sensors. Simulation support for these features is planned for a future release.
See Also
- Communication - BLE connection and data exchange
- Troubleshooting - Common issues and solutions